


“America’s Dinner Mom” shares why she loves her freezer, and why you should too.

To those who swear they hate freezing meals because of freezer burn (basically when air meets frozen food), I say – just wait. I’ll make a convert of you yet. Having pre-frozen food available gives you peace of mind, saves trips to the grocery store, and solves that age-old problem of catering to picky eaters who often don’t want the same thing you’re having.
To me, having a freezer full of food “just in case” makes sense. You know the food’s there, so when you’re super-busy (and who among us isn’t?) you can defrost it, heat it up, and have a steaming home-cooked meal on the table in minutes. It’s how I was brought up. My mom was always big on freezing our meals, making more than enough so there would be leftovers for a night when she didn’t have time to cook. She’d place chicken parmigiana, for example, in tin foil with a handwritten note on top, marking the date she prepared it and what it was. She’d then put it in a Ziploc bag so that on nights she worked late, my sister and I could take out what we wanted and start heating up dinner. Sometimes we all had different things for dinner, but we all ate together.
Another plus: We always had more than enough food. In fact, my mom became a favorite among my high school friends – they knew, even at the last minute, they’d always be welcome at our family’s table. My mom’s mantra: The more the merrier. Not to mention, thanks to her former school-teacher background, she knew that kids open up and talk more with their friends gathered around. And because my friends were so comfortable talking to her, she got lots of information! While I haven’t been privy to the same gossip (as a writer, my girls know they eventually end up in my stories and hate that), I follow the same freezer rules. It helps that many items freeze well, such as meats, chicken, fish, vegetables, casserole dishes, chili, stews, soup, bread, pastries, and cookies.
The secret to freezer-happy dinners is to label your foods. That includes marking and dating items clearly with a Sharpee or a label and placing the newest food in the bottom or near the back of the freezer, then rotating the older ones forward so they are next in line for use. And though it may sound a bit fanatical, it’s also a good idea to post a list of all your frozen food (with dates) near the freezer and check off what is used. To retain the best texture and flavor, most home-frozen foods should be used within six to nine months.
Some other rules of thumb:
Wrap well. 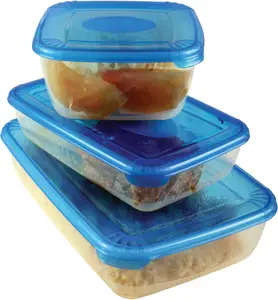
Freezer burn is dehydration of the food caused by improper packing and, though it’s not harmful, it does adversely affect the food’s texture and color, causing kids to go “eww.” Since the last thing you need when trying to get dinner on the table is a picky eater who refuses a meal, you need to make sure you wrap the food correctly in the first place.
Use proper storage items.
In other words: freezer bags or containers, foil, or freezer wrap. You can also use heavy-duty plastic containers or jars, but never glass, as the extreme temperatures may cause it to break. Leave some space at the top of containers, as foods will expand during freezing. Try to prevent air coming into the package or moisture from escaping, as these dry out food and affect quality.
Package foods in meal-sized portions.
This works wonders for moms with carpools to drive and little time to prepare a decent dinner. It also makes it possible to serve three children three different items. If you have more than one piece in a portion, you may want to place a sheet of freezer paper between them to prevent them from sticking together. I’m a big fan of keeping frozen protein of all kinds (ground beef, chicken, fish) in the freezer at all times. That way, you know you always have some kind of meal on hand.
Repack grocery store items.
To avoid losing texture and flavor, repackage store-bought items promptly (ideally within two hours of purchase, one hour if the temperature is above 90 degrees F), and place them in freezer wraps or bags to ensure secure wrapping. As always, wash hands in hot, soapy water before and after handling raw meat, as well as all utensils, cutting boards, and counters that may have touched raw foods.
If freezing fresh vegetables, it’s best to clean them, blanch for two to four minutes, dry, and cut into bite-size or serving-size portions. Blanching simply means dunking the veggies in boiling water for a few seconds and then immediately into ice water to stop the cooking process. This stops enzyme actions that cause loss of flavor, color, texture, and nutrients. It’s worth the few extra minutes to blanch, though buying frozen veggies from the get-go is an easy alternative.
Marinate items before you put them in the freezer. When they are in the freezer, the molecules expand, pulling in the flavor.
Learn to “flash freeze.”
Items like berries, bananas, peppers, and onions, are great for this. Prep the food (wash, peel if necessary, then cube, dice, or slice); then lay out on a baking sheet and place in your freezer. When solid, place the items in zip-lock baggies, and they’re ready to use at will. And you can take advantage of the sale items for use another time. Frozen fruits are perfect for smoothies, yogurt parfaits, muffins. Veggies work for all kinds of main dishes, eggs, or quiches.
A friend of mine takes this one step further and has a baggie just for breakfast tacos/omelets full of peppers, onions, frozen cubed hash brown potatoes, and any pieces of leftover sausage and/or bacon. When needed, she simply warms a small handful of the mix in a sauté pan before adding the eggs…and voila! Instant breakfast tacos or omelets without all the prep. Kids can even use this for microwave eggs, all of which are great for those nights when you decide to do breakfast for dinner.
What NOT to Freeze
- High-water-content vegetables (lettuce, tomatoes, celery, etc.)
- Eggs
- Creamed cottage cheese
- Sour cream
- Potatoes
- Cooked pasta (unless very firm)
- Most spices and extracts
- Cake or pie with custard filling
- Lunch meats
- Mayonnaise
- Sauces thickened with flour or cornstarch, except when used as a binder for other ingredients.
- Light cream (You can freeze milk but it tends to separate; just shake it well when defrosting.)
- Raw vegetables, unless they have been blanched first
Time-Saving Tips
- If you’re cooking specifically to freeze something, slightly undercook it, as it will finish cooking once reheated.
- Cool foods before you freeze them. Freezing food when hot will only increase the temperature of the freezer and could cause other foods to start defrosting.
- Always freeze food as quickly as possible to maintain quality and freshness, and freeze items at 0°F or lower for best quality.
- Never re-freeze anything that’s been frozen. Even if the food was frozen raw and then cooked, to be extra-safe it still shouldn’t be re-frozen. If in doubt, throw it out.
- Whatever you do, don’t forget to label – this is key.
- If you pull out a meal from your freezer and don’t like the look of it, despite the recent date on it, toss it. Again, when in doubt, throw it out.
- Remember the pantry rule: First in, first out.
- Defrost frozen ground meat in the fridge first. Ideally, take it out the night before you plan to serve it. As a general rule, placing food on the counter for a few hours to defrost at room temperature is okay.
Also see: How to Have Better Dinner Conversations with Your Family
Healthy After-School Snacks for Kids