Use a mathematics technique to create beautiful art.
Sometimes equations are too hard to solve, even for professionals! For these problems, people invent methods that are easy to compute and approximate the solution. This branch of mathematics is called Numerical Analysis. These numerical algorithms are usually done on a computer, and by doing more calculations you can make your approximate solution as good as you need. Curve stitching is a way to approximate a curve by drawing only straight lines, without any computation needed. The closer you draw the lines together, the better the approximation to the curve you make. We can use the same technique to make a variety of curves and shapes that can be turned into beautiful art.
Materials
|
Stitch A Star
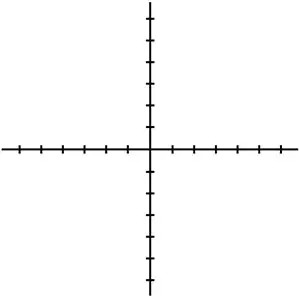
1. Using a pencil, lightly draw two lines in the shape of a plus sign on your manila folder. (Don’t press too hard; you’re going to erase them later.) Using your ruler, make even marks from the center point and moving outward along each line.
|
Draw a plus sign. With a ruler, make even marks along each line. Use a pushpin to make a hole at each mark. |
2. Using the pushpin, carefully poke a hole at each mark on your folder. This is easier to do if you put your folder over something that you can push pins into safely, like a piece of corrugated cardboard or a thick, folded towel.
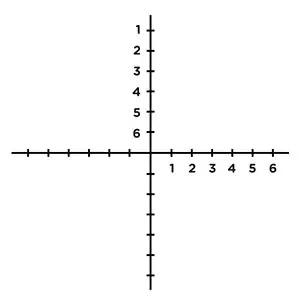
3. Lightly number two of the lines as shown.
|
Lightly number two of the lines. |
4. Cut a piece of thread about the length of your arm and thread it onto your needle.
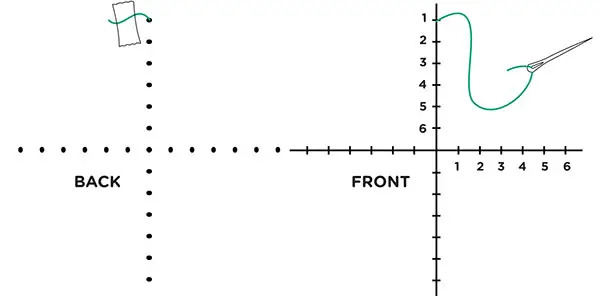
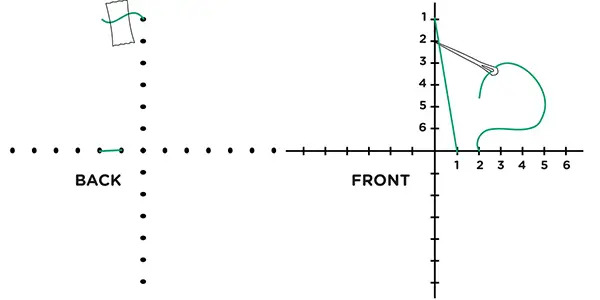
5. Starting from the back of your folder, push the needle through the hole you labeled No. 1. That is at the tip of your star. As you pull the thread through the hole, stop when there are a few inches still sticking through and tape the end of the thread down on the back of the folder very securely. Tug on the thread a little to make sure it won’t slip through.
|
Push the needle through the back of hole No. 1. Tape the last few inches of the thread to the back of the folder. |
6. Your needle should be on the front side of your folder now. Push the needle down through the other hole marked No. 1 to make a long stitch. Your thread should connect the two dots.
7. Starting on the backside of your folder again, push the needle through the hole right next to it, which should be hole No. 2, making a short stitch. Then, from the front side, you can make another long stitch to connect both No. 2 holes.
|
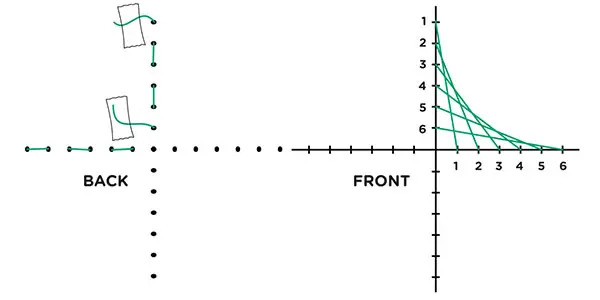
Make a short stitch through the back of hole No. 2. From the front, connect the two No. 2 holes with another long stitch. |
8. Continue like this for the rest of the holes. You should have long stitches on the front side of your folder, and short stitches on the back. When you run out of thread, tape the end down on the back of your folder, cut another piece of thread, thread your needle, and keep going! When you’ve finished your curve, tape the end of the thread on the back of the folder and trim any long ends.
|
Continue like this for the rest of the holes. |
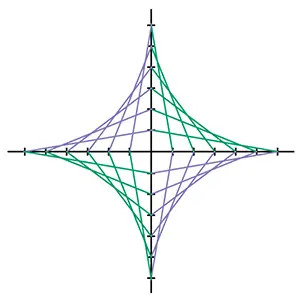
9. Stitch the other three parabolas in the same way to finish your four-pointed star! You can number the other axes if you need to. Experiment with using different colors for your lines.
|
Stitch the other three parabolas in the same way. |
10. Gently erase any visible pencil marks.
 |
Excerpted from Math Lab for Kids by Rebecca Rapoport and J.A. Yoder with permission of Quarry Books. |
RELATED:
Get Weekend Activities Sent to You


