


Celeb chef Kelsey Nixon shares her recipe for a deliciously simple yellow birthday cake with vanilla buttercream frosting, plus fun variations on the recipe and tips to make your decorations stand out.
Serves: 8 (one 9-inch layer cake)
Prep Time: 15 minutes (plus freezing time)
Cook Time: 40 minutes
Nothing says “I love you” more than a homemade birthday cake. I'm not one to knock a boxed cake mix and definitely feel that there is a time and place for them, but if there is ever an excuse to make a really good layer cake from scratch, this is the occasion.
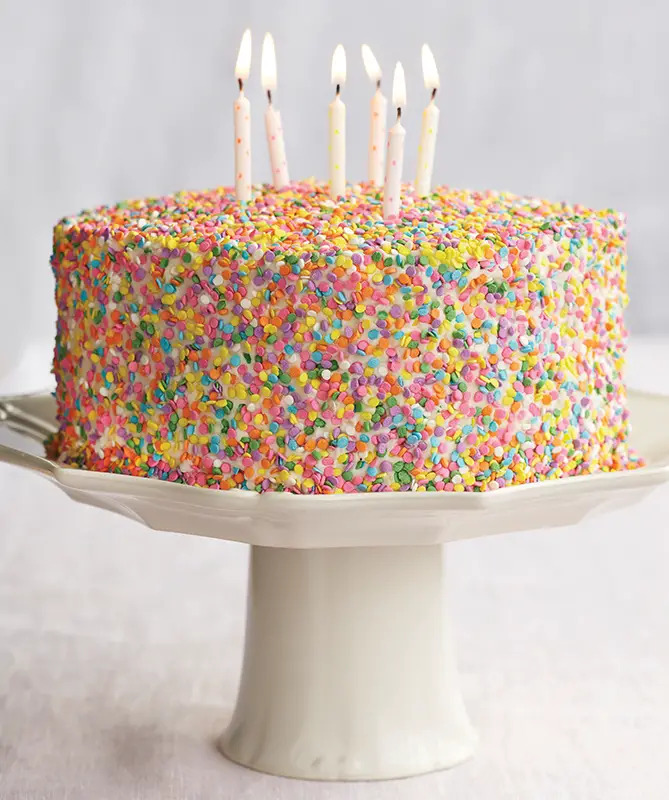
This vanilla frosting over vanilla cake combination is crazy delicious and always works. The beautiful fluffy yellow cake has a crumbly texture and the vanilla buttercream is just sweet enough—and easily adapted to other flavorings (see variations at right).
Here's a tip for a smooth frosting with no crumbs: Use the freezer. Wrap each layer of cake in plastic wrap and freeze overnight to make it easier to frost.
For the final touch, I’m of the opinion that every homemade birthday cake deserves rainbow sprinkles.
Yellow Layer Cake
Ingredients
3½ cups all-purpose flour
2 tablespoons cornstarch
2 teaspoons baking powder
1½ teaspoons baking soda
1¼ teaspoons kosher salt
1 cup (two sticks) unsalted butter, at room temperature
2 cups sugar
4 large eggs, at room temperature
2 cups buttermilk
1 tablespoon vanilla extract
Directions
1. For the cake: Preheat the oven to 350 degrees. Generously butter and flour two 9-inch round cake pans, line with parchment paper circles, and butter the parchment.
2. In a medium bowl, sift together the flour, cornstarch, baking powder, baking soda, and salt.
3. Using an electric mixer, cream together the butter and sugar on medium-high speed until pale yellow and fluffy, 3 to 5 minutes. Add the eggs, one at a time, beating well after each addition and scraping down the sides of the bowl. Reduce the mixer speed to low, add the buttermilk and vanilla, and mix until just combined. Slowly add the flour mixture and mix until just combined.
4. Divide the batter evenly between the prepared cake pans and tap the pans on the counter several times to get rid of any air bubbles.
5. Bake until golden and a cake tester inserted in the center of a cake comes out clean, 35 to 40 minutes.
6. Transfer the pans to a wire rack and let cool for 10 to 15 minutes. Run the blade of a butter knife around the edges of the pans to release the cakes. Invert the cakes onto a wire rack and discard the parchment. Let cool completely, approximately 1 hour. Wrap both layers in plastic wrap and freeze for at least 30 minutes or up to overnight.
Vanilla Buttercream Frosting
Ingredients
2 cups (four sticks) unsalted butter, at room temperature
6 cups powdered sugar
2 teaspoons kosher salt
2 teaspoons vanilla extract
¼ cup milk
½ cup rainbow sprinkles
Directions
1. Using an electric mixer, beat together the butter, powdered sugar, and salt on low speed until combined, approximately 2 minutes. Scrape down the sides of the bowl, increase the mixer speed to medium high, and beat until fluffy, approximately 3 minutes. Add the vanilla and milk and beat on medium-high speed until the frosting is light and fluffy, 3 to 5 minutes.
2. Remove the frozen cake layers from the freezer and unwrap. Put one layer on a cake stand and spread approximately one-third of the frosting onto the top of the layer. Put the second layer on top of the first and top with another one-third of the frosting. Spread the last one-third of the frosting on the sides. Decorate with the sprinkles and serve.
Buttercream Variations
Chocolate Buttercream: Sift 1 cup of cocoa powder together with the powdered sugar before creaming with the butter and salt.
Orange Buttercream: Add 1 tablespoon grated orange zest to the mixture.
Almond Buttercream: Substitute 1½ teaspoons almond extract for the vanilla extract.
Frosting Tips
Beautifully topped cakes, cupcakes, or cookies will have everyone fooled that your dessert was frosted at the best bakery in town. Here are a few techniques that I always rely on:
Chill everything. Before frosting, make sure your cake or cupcakes are completely cool. I like to put them in the freezer to get them super chilled. Also, if you are frosting a cake, apply a thin, preliminary layer of frosting, called a crumb coat, on the chilled surface and chill it again. This locks in all of the crumbs, giving you a smooth surface—this makes it much easier to apply a smooth final coat of frosting.
Invest in an offset spatula. This tool makes frosting so much easier and faster. I like having a small one on hand for things like cookies, and a larger one for frosting layer cakes.
Use enough frosting. The spatula should never touch the surface of the baked good; it should only be making contact with the frosting. I use the tip of the spatula with light pressure and back-and-forth strokes. Avoid lifting the spatula straight up as that could pull off crumbs.
Finish smoothly. To give your baked goods a smooth and shiny finish, dip your spatula into hot water and dry it. Then carefully slide the heated surface over the frosting, melting it just enough to give it a smooth finish. Repeat as needed.
|
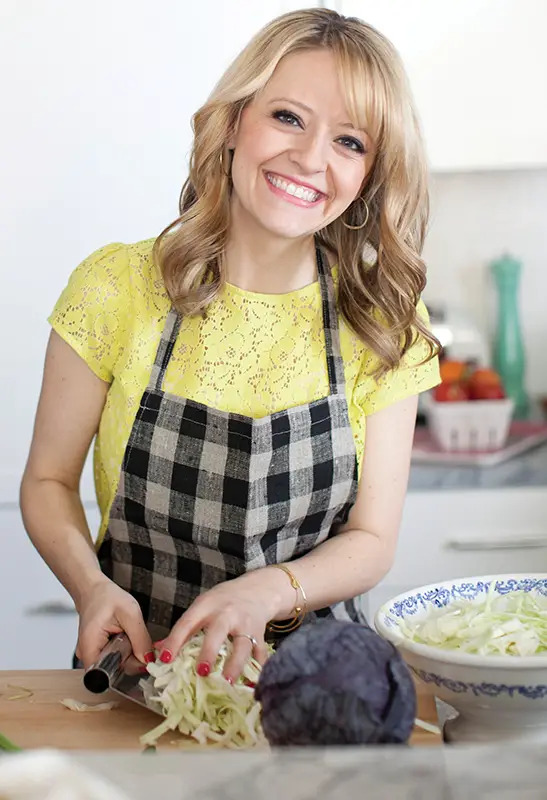
Kelsey Nixon is the author of Kitchen Confidence and host of Kelsey’s Essentials on the Cooking Channel. |